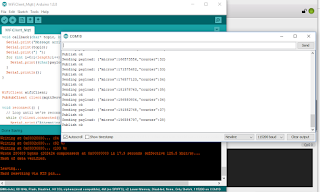
In order to demonstrate these at the Senior CoderDojo I fired up the:
1) ESPlorer.jar IDE for NodeMCU.
switched to using Adruino IDE
https://www.instructables.com/id/Programming-ESP8266-ESP-12E-NodeMCU-Using-Arduino-/
In Adruino Preferences, Additional Board Managers URLs box enter
http://arduino.esp8266.com/stable/package_esp8266com_index.json,https://dl.espressif.com/dl/package_esp32_index.json
and then update button in Tools > Board Manger (search for 8266)
Should then be able to select the 8266 board > "Node MCU 1.0 (ESP-12E Module)"
Worked briefly until it flashed device!
#define LedPin D0
// the setup function runs once when you press reset or power the board
void setup() {
// initialize digital pin LED_BUILTIN as an output.
pinMode(LedPin, OUTPUT);
}
// the loop function runs over and over again forever
void loop() {
digitalWrite(LedPin, HIGH); // turn the LED on (HIGH is the voltage level)
delay(1000); // wait for a second
digitalWrite(LedPin, LOW); // turn the LED off by making the voltage LOW
delay(1000); // wait for a second
}
Sketch uses 257712 bytes (24%) of program storage space. Maximum is 1044464 bytes.
Global variables use 26572 bytes (32%) of dynamic memory, leaving 55348 bytes for local variables. Maximum is 81920 bytes.
esptool.py v2.6
2.6
esptool.py v2.6
Serial port COM10
Connecting....
Chip is ESP8266EX
Features: WiFi
MAC: ec:fa:bc:28:71:df
Uploading stub...
Running stub...
Stub running...
Configuring flash size...
Auto-detected Flash size: 4MB
Compressed 261872 bytes to 191272...
Writing at 0x00000000... (8 %)
Writing at 0x00004000... (16 %)
Writing at 0x00008000... (25 %)
Writing at 0x0000c000... (33 %)
Writing at 0x00010000... (41 %)
Writing at 0x00014000... (50 %)
Writing at 0x00018000... (58 %)
Writing at 0x0001c000... (66 %)
Writing at 0x00020000... (75 %)
Writing at 0x00024000... (83 %)
Writing at 0x00028000... (91 %)
Writing at 0x0002c000... (100 %)
Wrote 261872 bytes (191272 compressed) at 0x00000000 in 16.9 seconds (effective 124.2 kbit/s)...
Hash of data verified.
Leaving...
Hard resetting via RTS pin...
You need to press RST button on board to run the program..
These projects saved to C:\Users\kilnageer\Documents\CoderDojo\2018 Reboot\NodeMcu on my laptop along with screenshots.
Next tried the WifiClient example and got:
Connecting to vodafone-2124
.....
WiFi connected
IP address:
192.168.1.115
connecting to djxmmx.net:17
sending data to server
receiving from remote server
"When a stupid man is doing something he is ashamed of, he always declares
that it is his duty." George Bernard Shaw (1856-1950)
So all working great next to add DHT11 sensor code and MQTT client publishing!


No comments:
Post a Comment